Flashing boot image on your MediaTek device using SP Flash tool
Below in this guide, we will help you to blink the Magisk on any MediaTek powered tool utilizing the SP Flash tool. Review our detailed overview correctly! To flash you need to initial develop, the patched boot photo declares your gadget was making use of Supply boot picture from your own ROM data.
Customizing an Android smartphone as well as doing advanced tweaks like blinking personalized kernels, personalized ROMs, overclocking as well as changing system settings is fun. However, you need origin access to your gadget to be able to do these. Well, Magisk is a one-way free ticket to perform all these tweaks on your tool.
Note: Your warranty may get void after following this procedure. We won't be responsible for anything happening to your device during this process, as you are the one who has decided to do this modification. All the steps mentioned below are tested & found to be working correctly! Make sure to read & follow each step carefully.
Pre-Requisites
- See to it to have adequate battery costs on your phone to avoid disturbance during the patch installation.
- Before executing any adjustment, take the backup of your tool information.
- This guide is purely for MediaTek powered devices. Do not utilize it on any other tool CPU like Snapdragon, Spreadtrum and so on
- It would help if you had a PC/Laptop with a micro USB wire to attach.
- Make sure that you download and install all the needed files on your PC/Laptop
Downloads:
- Download And Install ADB and Fastboot files. (Windows/MAC)
- Download and Install Android USB Drivers
- Download and install the latest Stock ROM for your corresponding tool.
- Download and Install SP Flash tool on your Computer/ Laptop
What is Magisk?
Magisk is a systemless user interface assists you add different modules to the tool. It is based on the superuser, which is an open-source root solution. With this device, you can boost the use of your gadget, and also you get one of the most out of your Android gadget. It is not only a rooting application; it likewise permits the individual to hide root from particular apps, as well as additionally give the capacity to infuse extra functions into the Android OS conveniently. If you install the new Magisk Manager, you can merely upgrade to the Magisk from within the manager application.
How to Extract and Patch Boot.image using Magisk?
Step 1: Download as well as draw out the ROM to your PC.
Step 2: Attach your gadget using a USB cord and duplicate just the boot.img data from the extracted folder to your gadget storage space.
Step 3: Introduce Magisk Supervisor. When a popup appears asking to set up Magisk, choose INSTALL and also select mount once more.
Step 4: Tap on "Patch Boot Photo File".
Step 5: Browse to interior storage space and also select your phone's boot image that you moved earlier.
Step 6: Wait for several seconds. Magisk will begin patching the boot photo.
Step 7: Once the boot photo has been covered, duplicate the "patched_boot. img" from the inner storage space as well as change it in the same drawn-out ROM folder on your PC.
Now you can comply with the 2nd action to blink the patched boot photo file.
How To Install the Patched Boot Image on MediaTek device
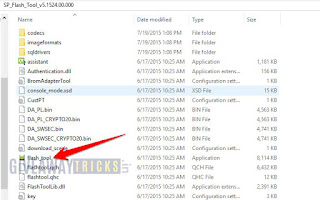
Step 1: Set Up the SP Flash tool on your PC and also run the flash tool exe file. sp flash tool

Step 2: When SP Flash device lots, you will see the screen with a smartphone photo, Now Touch on the menu download (See the screenshot listed below) sp downloader.

Step 3: Currently, in the download tab, you will certainly discover the choice Download agent and also scatter-loading, Now click on the Download Representative and MTK_AllInOneDA. bin (It is inside the SP Flashtool folder -> SP_MDT) download agent.

Step 4: In the very same tab, Tap on the Scatter-loading menu and also load the Scatter file, which is inside the Supply ROM removed zip. (If you have drawn out, you will find the folder named MT6xxx_Android_scatter. txt)-- MTxxxx below XXXX is the number of MediaTek processors scatter documents.

Step 5: Now fill the MT6xxx_Android_scatter. Txt documents.
Step 6: When you have packed, ensure to untick all the data other than bootimg.

Step 7: Currently, click the Download and install to blink.

Step 8: Currently to start the Flashing procedure, you need to Eliminate your battery (Only if battery detachable or switch off) Insert once again, Hold the Quantity Down and also Volume Up essential together as well as Link your Phone to PC/Laptop making use of USB Cable (Maintain the Quantity Down as well as Volume Up switch up until your computer system spots the phone.).
Step 9: Once the phone links, Blinking will start, Wait for a couple of mins or Two.
Step 10: After Flashing has finished, you will see an environment-friendly switch will appear sp eco-friendly ring.
Step 11: Now, you can shut the SP Flash Device and also Detach your phone as well as Reboot to see if your gadget has rooted effectively.
Conclusion:
That's it. If you followed every step correctly, your device should be rooted by now and will work flawlessly with an increase in battery life, performance, and power.
Comments
Post a Comment